Contains information for creating and editing users to include Agency Admin/Agency User and Company Admin/Company Users.
An Agency Admin can set up GraspDATA users. An Agency Admin or Agency User will be able to view all account data. A Corporate User (Company Admin or Company User) will only see the accounts included in the Corporation profile that they are associated with.
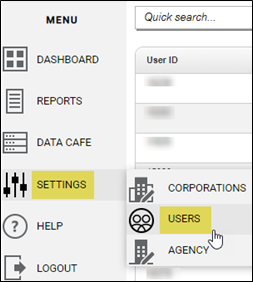
Under the Menu go to Settings > Users. This will take you to the Users page where you can create or edit a user.
Add New User
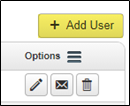
To add a new user, click on the [+ Add User] button in the upper right corner.
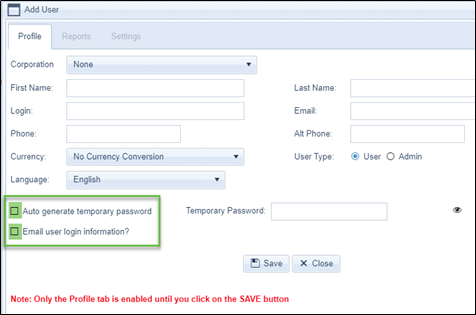
This will open the Add User window.

Profile Tab
This is where you will determine if the user will have access to all agency data or data for just a specific corporation, and if the user will have Admin or User rights. The Reports and Settings tabs will become functional after completing the information and clicking Save on the Profile tab.
Click here to be taken to the page that explains the rights of an Admin vs a User.
- Corporation:
- ‘None’ will allow the user to see all data for all accounts, and these users will be created as Agency Admins or Agency Users. Click here to access a short step-by-step video about creating an Agency Admin or Agency User.
- If the user is to be a Corporate User, use the drop-down arrow to select the corporation they should have access to. Click here to access a short video on how to create a Company Admin or Company User.
- Note: If a corporation profile has not been created, this will need to be done first. Click here to be taken to the page for ‘Create or Edit Corporations’ and/or click here to access a short video about this subject.
- First and Last Name: This can be filled in with the actual name, or can be left generic if desired, such as First Name – Reporting, Last Name – User.
- Login: The login can be in email format if desired. User logins can only contain letters, numbers, dashes and underlines. They cannot have any spaces. Note: The login username cannot be changed after creating, so verify spelling before clicking on Save.
- Email: Must enter a valid email address. This email address is used for password re-set.
- User Type: Allows the new user to have either Admin or User rights. User is the default. Note: This cannot be changed after creating, so verify the rights you want the new user to have before clicking on Save.
- Password: The password must have a minimum of 8 characters and include at least one upper case, lower case, numeric, and special character. For PCI compliance, once the user is set up, the password can only be changed by the user. An Agency Admin does not have the ability to change a password for other users, but they can generate a new temporary password. Click Here for the page containing Admin Steps to Reset a User's Password.
-
When creating a new user, there are two options for creating a temporary password for that user. The Admin can create the temporary password, or use the system to auto-generate a temporary password. The details of both options are included below. Please choose whichever option you prefer.
-
Admin Create a Temporary Password Steps
An Admin can create a temporary password when adding a new user. Unselect the ‘Auto generate temporary password’ and ‘Email user login information?’ boxes:
Type the password of your choice in the Temporary Password box. As you type a password in the Temporary Password box it will show how strong the password is that you are typing.

Clicking on the eye icon will show the password entered.

You can select ‘Email user login information’ and the system will send an email to the user with the details, or you can provide the login details by sending your own email to the user.
Tip: For PCI compliance it is best to send two emails. Include the Username in one email and send a second email with their temporary password that you created. The User Name and Password should not be in the same email.
NOTE: When the user logs in with the temporary password, the next pop-up window will be to reset their password. The user will be required to reset the password upon first login. Complete steps to reset a password are on this page: Reset GraspDATA Password - Admin Steps)
Admin Auto Generate temporary password + Email user login information Steps
Check the boxes to auto generate a temporary password AND email user login information.

When the above two boxes are checked, the user will receive two emails with their login details. (If the user does not receive the email in their inbox, please have them check their junk/spam/quarantine emails to see if it was routed there.)
-
-
- One email contains the User Name, the login URL, and this note: Your temporary password will be sent separately soon. A password reset will be required upon initial login.
- The second email contains the temporary password.
- The user will utilize the URL, User Name, and temporary password that either you provide to them in personal emails (Admin create a password), or that they receive in our system generated emails.
- When the user logs in with the temporary password, the next pop-up window will be to reset their password. The user will be required to reset the password upon first login. (Complete steps to reset a password are on this page: Reset GraspDATA Password - Admin Steps)
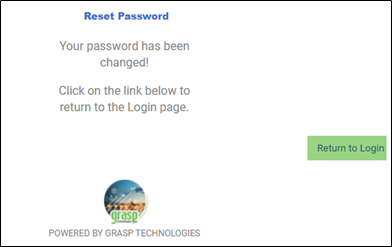
- Once the password has been successfully reset this window will display. The user will click ‘Return to Login’ and use the new password that they created to log in to our site.
-
- Once the new user information is complete, click Save

Reports Tab
This tab allows the option of providing all reports or assigning specific reports to a user. There is not the ability to see sample reports on this tab, so you will want to know the report names and numbers to make it easier to find the reports you wish to assign.

- To Assign Individual Reports: Use the Search field, for Available Reports. Locate the report, click on the report to highlight it, and then use the single arrow to move it to the Assigned Reports section. You can hold the Ctrl key down to highlight and select more than one report and use the single arrow to move selected reports to Assigned. You can also drag & drop the report from one side to the other.
- To Assign All Reports: Use the double arrow to move all reports to the Assigned Reports section. Note: For Corporate Users, we do not recommend assigning all reports as some include commission or information specific to the Agency.
- Note: Assigning or removing reports does NOT require a Save. The reports assigned or removed are immediately updated in the User's account.
- Report Packages: If consistently assigning the same group of reports to users, a Report Package can be created which makes it very easy to assign a group of reports to a user. On the Reports tab, click the Report Package drop down list and select the Report Package you would like to assign to the user. Once you select a Report Package, the reports in that package will be displayed under 'Available Reports'. Click on the double arrow to move all reports to the ‘Assigned Reports’ side. You can assign multiple Report Packages to a user by following the same steps. You can also select All Reports from the drop down list to view all reports and then use the arrow, or drag & drop, to assign individual reports.
-
-
- Click here to access a short step-by-step video about Report Packages.
- Click here to access our Report Packages page.
-
Settings Tab
This tab allows the admin to select the options the user will see when they login. Some options are always enabled for Agency Admins, but not for the other types of users.
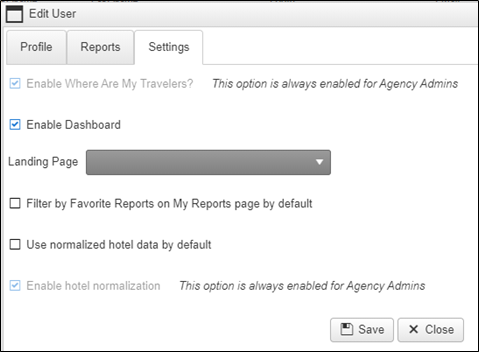
- Enable Where Are My Travelers: This allows users to see the Where Are My Travelers option under the Dashboard tab.
- Enable Dashboard: This allows users to have a Dashboard.
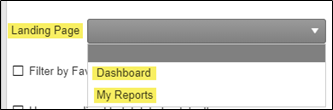
- Landing Page: This is the page that user will see upon login. If the dropdown is left as the default (blank), the Landing Page will be the Dashboard. Or by using the drop-down arrow, it can be set to have the Landing Page be the ‘My Reports’ page.
- Filter by Favorite Reports on My Reports page by default: This will enable the Favorites Filter when the user goes to the ‘My Reports’ page.
- Use normalized hotel data by default and Enable hotel normalization: These are both used with our ancillary product GraspSNAP, which is our hotel normalization software. Please reach out to support@grasptech.com if interested in learning more about GraspSNAP.
- Click Save once the settings are completed as needed.
After creating the new user, and clicking on Save when applicable, click [X Close] to return to the Users page. Review the password steps above to send the login URL. login username, and password to the user.
Edit Existing User
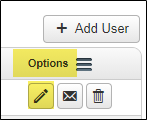
To edit a user, on the Users page, find the user in the list using the Quick Search or column filters, if needed. Then, click on the Edit (pencil) icon under the Options column. This will open the Edit User window and make the changes needed.
From the Edit User window, you can change the following:
- Profile Tab: User’s First Name, Last Name, or Email address
- Reports Tab: Assign or remove reports
- Settings tab: Change Dashboard, Where Are My Travelers, Landing Page, and Favorite Filter settings.
You cannot change the following on the Profile tab:
- Login: An existing login cannot be modified once created; it would need to be deleted and re-created.
- User Type: If the user has Admin or User rights cannot be changed. If a change is needed a new login must be created.
- User Password: The password for existing users can only be changed by the user themselves. An Agency Admin does not have the ability to change a password for other users, but they can generate a new temporary password. Click Here for the page containing Admin Steps to Reset a User's Password.