This information includes the process to create and edit a Corporation within GraspDATA. This process is only available to Agency Admins.
A corporation profile is needed if Agency Admins or Agency Users want to have the ability to easily select a corporation when running reports or setting up batches. It also is needed to set up a Corporate User, so the user would only see their own account data.
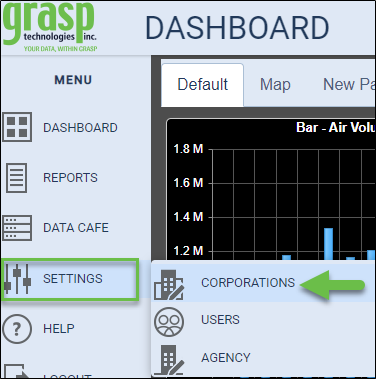
On the left Menu go to Settings and select Corporations.
This will take you to the Corporations page where you have the ability to add a new corporation or edit an existing corporation.
Add a New Corporation:
Click Here to access a short step-by-step video about this subject.
Click the [+ Add Corporation] button located in the upper right side of the page.

There are five tabs of information for a corporation: Contact, Branding, Settings, Sorts, and Account. The Contact tab must be completed and saved to access the remaining four tabs. The only other mandatory tab to set up is the Account tab to connect the applicable accounts to your new profile.

- Contact: The Corporation Name is required. All other information is optional. Add the Corporation name and then click Save.
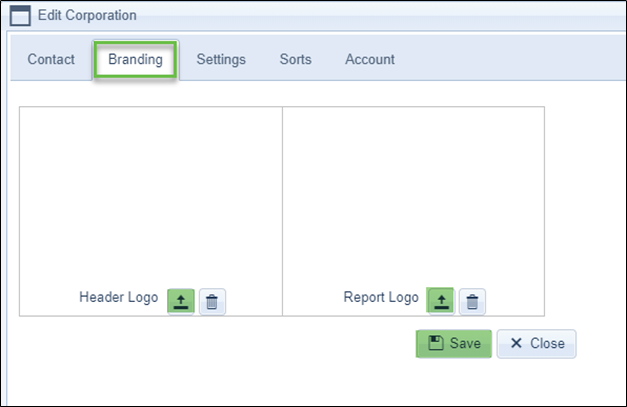
- Branding: The Corporation’s logo can be imported via the Branding tab to appear in GraspDATA and/or on reports. To see the Corporation logo when running reports, the user must log in using a Company Admin or Company User login for that Corporation. If no logo is added in the Corporation the logo will default to the Agency’s logo from the Agency settings.
- Header Logo: This logo will appear at the top left of the screen when logged into GraspDATA.
- Report Logo: This logo appears at the top left of your reports.
Working with graphics may require more than one attempt to resize and upload, but here are the baseline dimensions that can be used for both the header logo and report logos.
JPG (JPEG) format
210 width x 80 height
200 PPI (pixels per inch)
- Settings: The settings tab allows the administrator to apply various options for the users that are associated with that corporation.
- Show Data Cafe (Auto enabled, but can choose to disable.)
- Show Option to allow Voids on Data Inquiry Page
- Enable Where are my Travelers for Corporate users (An admin will still be able to choose to have this tab enabled or disabled for individual corporate users via the user’s settings.)
- Enable Prime Numbers (If applicable. Prime Numbers is an add-on product.)
- Enable Report Builder (If applicable. Report Builder is an add-on product.)
- Enable Dashboard (Auto enabled, but can choose to disable.)
- Landing Page: This allows the administrator to assign the page the software opens to upon log in.

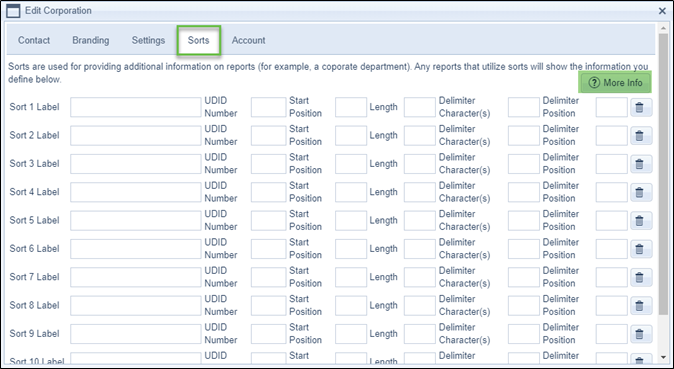
- Sorts: Sorts are used to include additional information on reports. For example, a department number, a job number, etc. Any reports that include sorts will show the information as defined on the Sorts tab of the corporation the report is run for. NOTE: Sorts should be set up the same across all Corporations. Click Here to access our Sorts FAQ page for additional details.
- Add the label for your sort
- If the sort pulls data from a UDID, add the UDID number
- Start position (most often use 1)
- Length (most often use 50)
- Delimiter Character(s) and Position (not as common, but are available when needed)
-
- Click More Info button to see Sorts Information Help window.
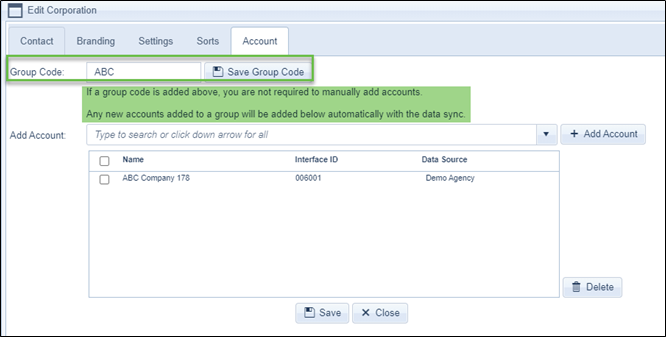
- Account: This tab is used to designate the back-office account(s) for the Corporation. You MUST enter at least one account in the Corporation, or you will see the response ‘No Data’ when you run reports for the corporation. Click Here to access a short step-by-step video about this subject.
- Locate the Account by typing the account name or Interface ID in the ‘Find Account’ field. Or use the drop-down arrow to scroll through all accounts.
- Select the account by clicking the check box in front of the account name. (Note: There needs to be at least one booking that has been invoiced and sync'd into Grasp for the account to be included in the list.)
- Click [+ Add Account] to attach that account to the corporation profile.
- Click Save.

-
- Group Code - If your back office has Group Code ability, you can use the Group Code feature. Add the Group Code then click Save Group Code and Save at the bottom of the page. Then when you add a new account to your back office and the Group Code exactly matches the Group Code in a Corporation profile, that account will be automatically added to the Corporation during the next sync.
- Group Code - If your back office has Group Code ability, you can use the Group Code feature. Add the Group Code then click Save Group Code and Save at the bottom of the page. Then when you add a new account to your back office and the Group Code exactly matches the Group Code in a Corporation profile, that account will be automatically added to the Corporation during the next sync.
Note: Once you have completed the information on the tab always click the Save button at the bottom of the tab. You will need to click ‘Save’ on each tab that you add, or change, information.
Edit Existing Corporation:
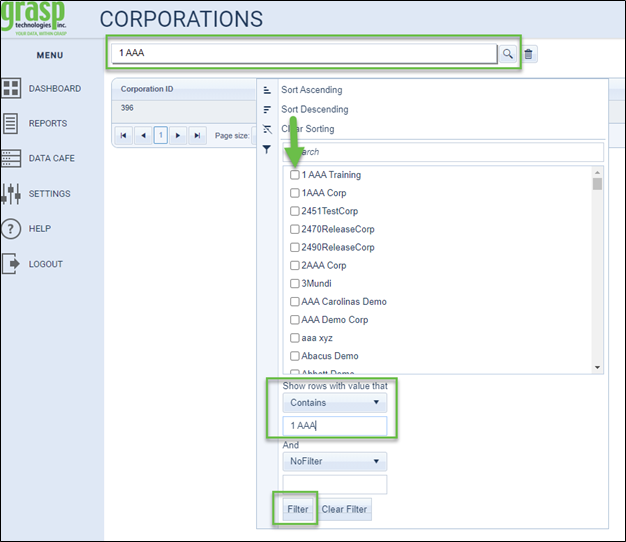
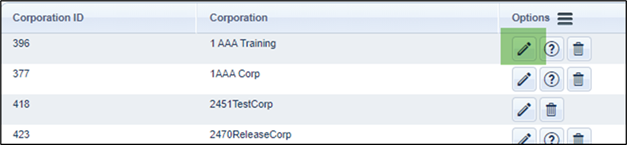
To edit an existing corporation, use the search field, or filters, to locate the corporation.
Click edit to the right of the corporation (pencil icon).
Make the changes needed to the Contact, Branding, Settings, Sorts, and/or Account tabs. Click Save on each tab modified.