This following provides step by step instructions to email reports from GraspDATA.
Click Here to access a short step-by-step video about this subject.
The Email Report feature can be accessed from three different locations which will open the same window to email the report. Emailing can be done when running a report, from report history, and for the distribution of a scheduled batch.
Emailing from the Run Report page:
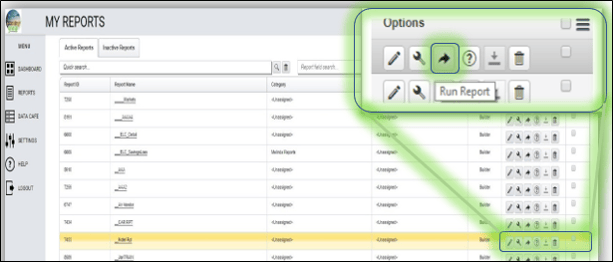
From the My Reports Page, select the Run Report option to run and email your report.
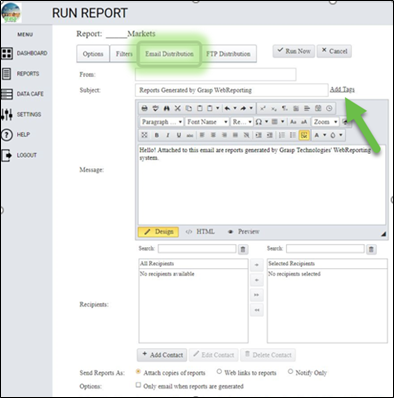
From the Run Reports page, you will have access to the Email Distribution tab.
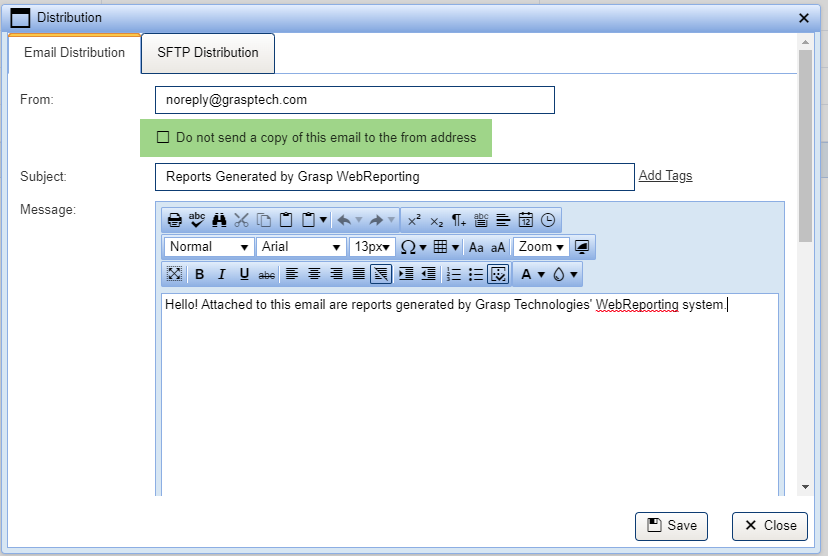
- From: this field will auto-fill with your email from your profile, can be changed if desired.
- Subject: this field is free form to allow a customized email subject line.
- The ‘Add Tags’ function is mainly used for Scheduled Reports (batches). Clicking on the link as shown with arrow in image below, will open a list of recurring dates. The user would select the recurring date range that matches the dates the reports in the batch are set with. Then, that date range will show in the email subject line. This allows the email recipient to easily see in the subject line what dates the reports contain.
- Message: this field is free form to allow a customized message in email.
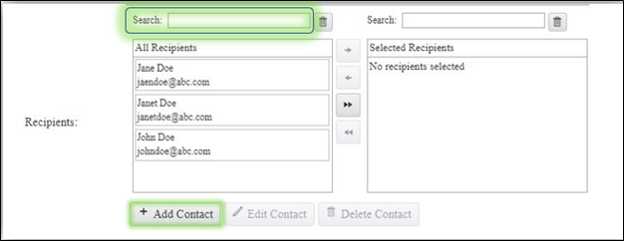
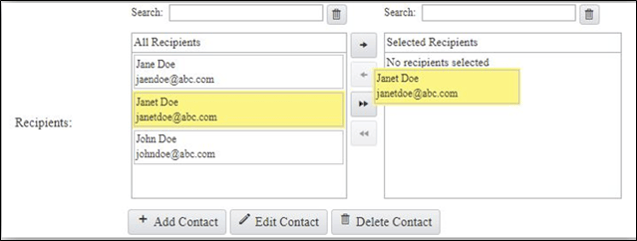
Recipients: This section allows you to search for contacts, create a new contact and move existing contacts to the list of individuals that will receive the emailed report.
- Use the Search field to look for existing contacts.
- Click on Add Contact to open the window if needed. Add Contact Name and Email and click on Save Contact when done.

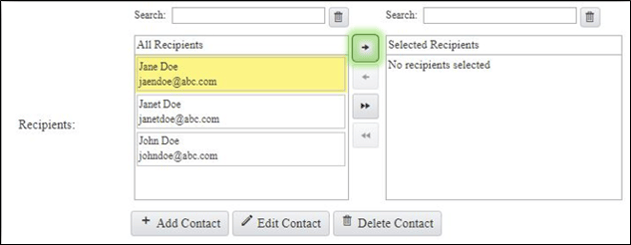
Selecting Contacts to be included on the Emailed Report.
- Highlight a contact or contacts and use a single arrow to move to the Selected Recipients window. You can hold down the Ctrl button while clicking on contacts to choose multiple contacts. PLEASE NOTE: The single arrow will move the contacts selected; the double arrow will move ALL contacts in your All Recipients list.
- Drag and Drop contact into the Selected Recipients field. You click on the contact, hold down the left click mouse, drag contact to Selected Recipients window and release.
Please Note:
- A contact cannot be edited or deleted if in the Selected Recipients window. The contact needs to be moved back to the All Recipients window, then the Edit Contact and Delete Contact buttons are functional.
- If you would like to receive a copy of the email, add yourself as a contact in the Selected Recipients window. When emailing multiple recipients (whether or not you include yourself) you will receive a copy of the email.
- If you do not wish to receive a copy of the email to the 'From' email address, click the check-box directly under the 'From' email address that shows - Do not send a copy of this email to the from address.
Send Report As: This section allows the user to choose if they want the report sent as an attachment or weblink.
![]()
- Attachments – this is the default and will send a report as attachment in the type selected in report setup, such as PDF or Excel.
- Web Links (public) – this will send the report as a weblink within the email. The weblink is valid for as long as the report is in Report History. Reports will auto delete from Report History at 6 months.
- Web Links (password protected) – this will send the report as a weblink and will need a password to allow the recipient to open. Upon selection of this option, a Web Links Password window opens where you will create the password. There is also a checkbox that if clicked will send a separate email to the recipient with the password created. The password email will ONLY be sent once.
- Notify Only – this will just send a notification email that the report has run and is Report History. This is generally used for Scheduled Reports (batches).
Please Note: The reports may automatically be sent as a Web Link if the servers determine that the files are too large for standard email attachments.
Options:
- Only email when reports are generated: This field is generally used for Scheduled Reports (batches) that may or may not have data, so that an email won’t send out if the report did not have data.
- Only distribute stitched reports when used: This field is used if stitching reports and only want the stitched report sent. (Please click here to be taken to the page for more information about stitching reports.)

If on the Run Report page, click on Run Now which will run your report and email it at the same time.
Emailing from the Report History page:
Click the checkboxes for the report or reports you want to email.
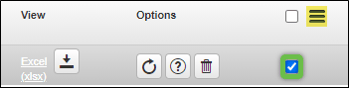
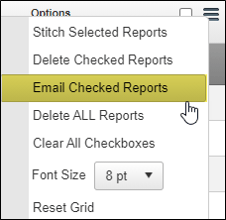
Click the More Options menu (3 bars) to open the box as shown below. Click 'Email Checked Reports' to bring up the Email Report History window.
Follow the instructions above for filling in the email window. Click [Send] at the bottom of the window when complete. This will email your selected report(s).
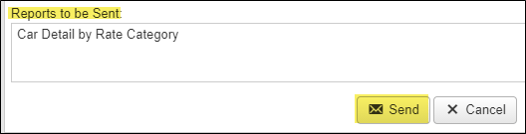
There is a Reports to be Sent box at the bottom of the Email Report History window. This shows the report(s) selected to be emailed.
Emailing from the Report Schedules page:
From the Report Schedules page, you can set up the distribution of a scheduled batch to email automatically or email a batch on demand (Ad Hoc). As mentioned above, the email window will always look the same no matter where it is opened from.
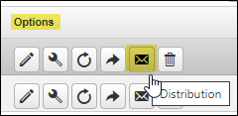
To quickly get to the email set up page for a scheduled batch, go to the Report Schedules page, and click on the Distribution (envelope) icon under the Options column. This will open the email window to set up the email information. Follow the instructions above to set up the email.

We have full instructions on setting up the scheduling and distribution for a scheduled batch. Please click here to access a short step-by-step video about this subject.
Please click here to be taken to the page for 'Scheduling and Distribution of Scheduled Batches'.
We have full instructions on running a batch manually (Ad Hoc).
Please click here to access a short step-by-step video about this subject.
Please click here to be taken to the page for 'Run a Batch Manually (Ad Hoc)'.