Steps to send a GraspPAY fax or email through DataCafe or report #15235 - GraspPAY Hotel Confirmation Print Copy. NOTE: if you don’t see that report #, search by the REPORT NAME as the report # may be different on your server.
DATA CAFE/DATA INQUIRY:
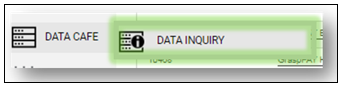
The fastest and easiest way to get the authorization is via Date Café. When logged into your GraspPAY login, click on Data Cafe > Data Inquiry from the left Menu.
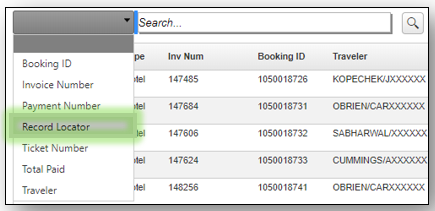
Once on the Data Inquiry page, use the drop down in the upper left corner and search by one of the fields, such as Record Locator, Invoice Number, Traveler, etc.
Note: Record Locator is the most common, and great way to see a specific booking quickly. Ticket Number is the option used for hotel confirmation number.
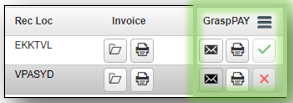
Once the booking is displayed, look for the icons under the GraspPAY column on right hand side. When needed, use the envelope icon to email the virtual card authorization or the fax icon to send the authorization via fax. The green checkmark or red X icons indicate whether the fax was successful or not (these are fax indicators only, not email).
To EMAIL a copy of the virtual card authorization, click on the envelope icon. This will open the GraspPAY Email Traveler window. If there were any emails listed in the PNR in GP- format when the booking was created and queued, those emails will show in the Email Address field. You can either clear those out and add in new emails, or type in additional email addresses, making sure to separate each with a semi-colon.
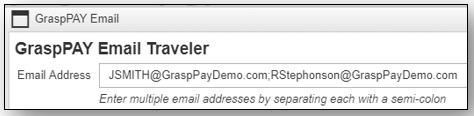
Once all email addresses are added, or updated, click Submit on bottom of screen to send the email.

To FAX a copy of the virtual card authorization, click the fax icon under the GraspPAY column. Verify the fax number and update the number if needed, then click Submit to send the fax

Reports/My Reports
Another option to obtain a copy of the virtual card is by using report #15235 GraspPAY Hotel Confirmation Print Copy. NOTE: if you don’t see that report #, search by the REPORT NAME as the report # may be different on your server. Using the report is beneficial when you need to send copies of multiple reservations.
Under the Menu on the left side, go to Reports, then click on My Reports. Search to find report #15235 (or search by the report name). Under the Options column, click on the Run (arrow) icon to get to the Run Report window.

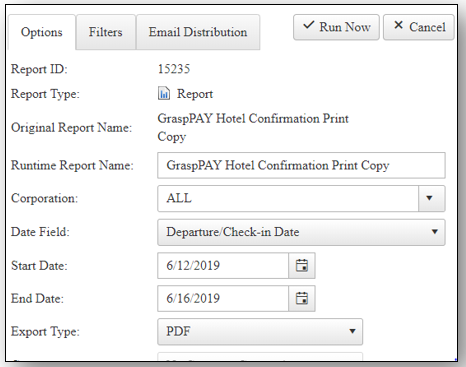
On the Run Report Options tab fill in the following:
- Corporation: Select the applicable Corporation or ALL
- Date Field: Select Departure/Check-in Date
- Start and End Dates: Using the calendar icon, select the date range
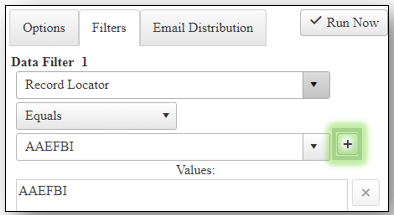
On the Filters tab use Data Filter 1 and from the first drop down field, we suggest you select the filter for Record Locator. In the lower drop-down field, type in the record locator needed. When you see the locator, click on it to select, then make sure to click on the plus sign on the right side to lock the choice in. If you need more than one booking, you can filter to find additional locators, making sure to click on the plus sign for each selection.
The PNR(s) selected should show in the 'Values:' box like example below.
Once your Data Filter information is complete, click on Run Now and you’ll be taken automatically to Report History. You can also get to the Report History page from the Menu under Reports.
Report History
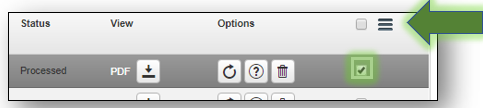
In Report History, under View, you’ll see the icon for the PDF document. Click on the icon to display the report. You can download and save the PDF, or email directly from Report History using the steps below.

To email a report from Report History, check the box on the far-right side and then click on the More Options Menu (3 bars) on upper right side of the header.
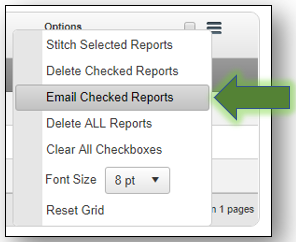
Clicking on the More Options Menu will open the below window, then click on Email Checked Reports.
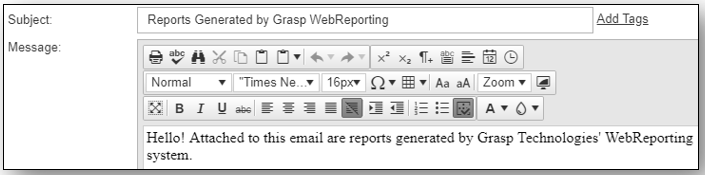
This will open the Email window. You can customize the Subject line and Message if you’d like. You can also change the From address field if desired.
At the bottom of the email window, you will need to add your contact if they are not already listed. Once created, the new contact will show on the All Recipients side and you can drag and drop via your mouse or highlight and use the single arrow to move the contact to the Selected Recipients side. You can add as many contacts as needed, and send emails to multiple contacts at once.

Click on the Send button at the bottom, and your PDF will be emailed to the contact(s) selected.
GDS Entries
You can also re-send the fax, or email, using the GDS entries in the PNR.
To FAX:
- Add an UPDATE remark
- Add a FAX remark changing the fax number from how it was originally sent by adding or removing 1- (Example if it was originally sent as 555-555-5555 add it as 1-555-555-5555 to generate a new fax).
- Re-queue the PNR to your GraspPAY processing queue.
To Email:
- Add an UPDATE remark
- Add the email address using the GP- format
- Re-queue to your GraspPAY processing queue.
Additional Page Resources: