Steps to add UDIDs over the number 99 when creating reports in Report Builder
The information below covers two ways to add UDIDs above the number 99 in Report Builder reports and the steps to add multiple UDIDs over 99.
Using Filters
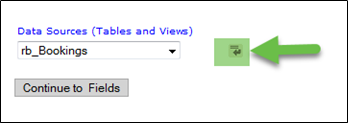
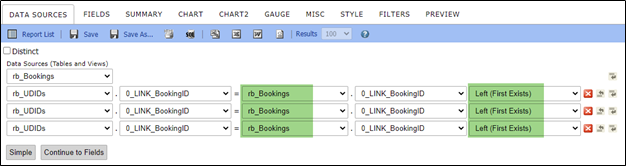
Click the Data Sources Tab.
![]()
Click the return arrow icon to create another source field box under rb_Bookings.
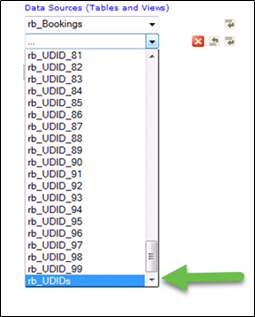
Select rb_UDIDs at the bottom of the list.
The UDIDs Table will link to the bookings table. The join on the far right will auto fill as Inner (Direct). We recommend changing the join from Inner to Left (First Exists) using the drop-down arrow so it looks like the image below.
- When Inner (Direct) is used and a booking does not have a UDID value included, the booking may not show on the report.
- When Left (First Exists) is used, the booking will display in the report even if there is not a value in the UDID selected.

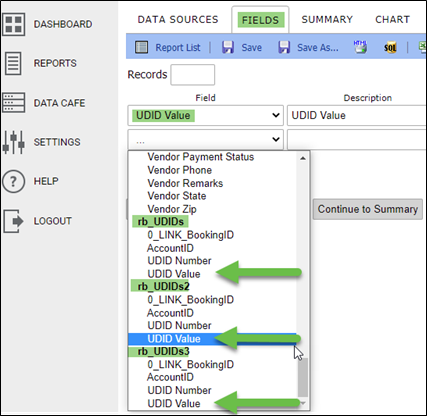
Click on the Fields Tab.

Scroll to the bottom of the fields list and under rb_UDIDs Select UDID Value.

In the next box type the description name of your choice. This will show on the report as the column header.

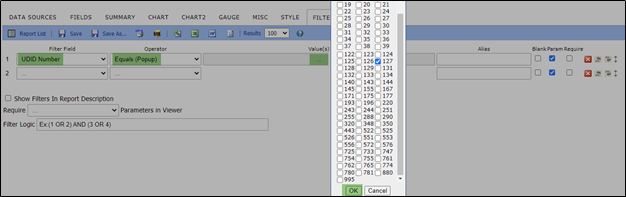
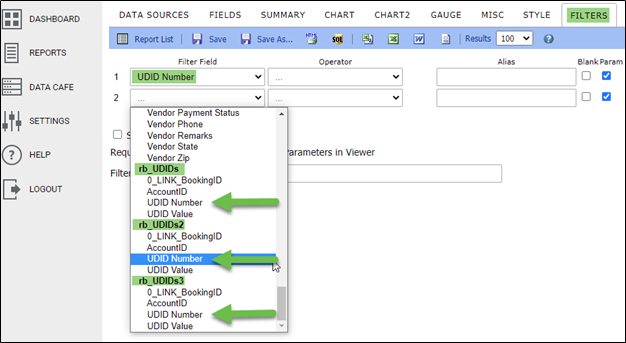
Click the Filters Tab. This is where you will assign the UDID number that you wish to filter for.

Using the drop-down arrow in the Filter Field, scroll to the bottom of the list and choose UDID Number.

Next select the operator function (Equals Popup is a popular choice).

- If Using Equals (Popup) Click the 3 dots in the Values box and a pop-up box will open showing all your UDIDs. Check the box for the UDID number that you wish to include, then click OK.
If using another Operator, add the UDID number to the Values area.
To verify the UDID data displays in the report, click the Preview tab, then add a date range and Corporation and click Continue. Review the preview of the report that displays to verify the data.
Save the report. Or, if you want to keep the current report as is, do a Save As and add a new report name to the window that displays, which will create a new report.
Add Multiple UDIDs over 99
To add another UDID over 99, repeat the same process as above.
On the Data Sources tab, add a rb_UDIDs instance for as many UDIDs over 99 that are needed. The middle join will auto fill to the table listed in the line above it and the join to the far-right defaults to Inner.
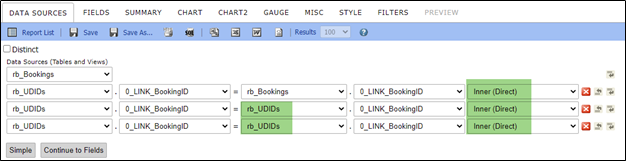
You will want to change the middle join to rb_Bookings, to link to that table, and we recommend changing the far-right join from Inner to Left as shown below.
Next, click on the Fields tab and click the drop-down arrow for Field.

Scroll down and towards the bottom you will see an instance for each UDID that was added on the Data Sources tab. The first added will be UDIDs and each subsequent one will be listed with a number after it. Example UDIDs2, UDIDs3, etc. Click on UDID Value to add a UDID Value field for each UDID needed.
Tip: As you add the UDID Value fields, in the Description box add which one is being used UDIDs2, UDIDs3, etc. you can go back and change the description after you set up the Filters tab.
Click the Filters Tab. Similar to the Fields tab, click the drop-down arrow for Filter Field. Scroll down and towards the bottom you will see an instance for each UDID that was added on the Data Sources tab. The first added will be UDIDs and each subsequent one will be listed with a number after it. Example UDIDs2, UDIDs3, etc. Click on the UDID Number for each UDID needed (UDIDs, UDIDs2, UDIDs3, etc.) Add the UDID Number filter for as many UDIDs over 99 that were added in Data Sources AND Fields tabs that you wish to have included in your report.
Tip: Double check the UDID set-up on the Fields tab and Filters tab to make sure you are setting up the UDID to match in both places. Example, if you added a UDID Value field on the Fields tab for rb_UDIDs2 and added UDIDs2 in the description and you want this set up for UDID 101. On the Filters tab when you add the UDID Number for rb_UDIDs2 it should be assigned 101. Then you can go back to the Fields tab and change the UDIDs2 description to show 101, or whatever name you would like UDID 101 to show in your report header. Keep a close eye on which UDIDs you are setting up in each of the tabs to ensure they match.
Select the operator function that you wish to use for each UDID Number field (Equals Popup or Equals Autocomplete are popular choices). In the Values area, add the UDID number to use for each UDID filter field.
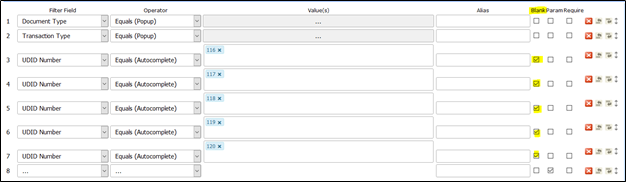
Tip: Check the ‘Blank’ box for any of the UDIDs that you would like the report to show even if there may not be a value in the UDID. If the ‘Blank’ box is not checked, the report will ONLY return bookings that contain data in every UDID 116-120 in the example above.
Repeat the steps above until you have all UDID numbers above number 99 setup that you want to have included in the report.
Using A Pivot Table to add UDIDs over 99 is another option
Start with the same steps, as above, to add the UDIDs in the Data Sources tab.

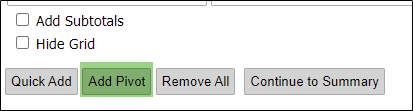
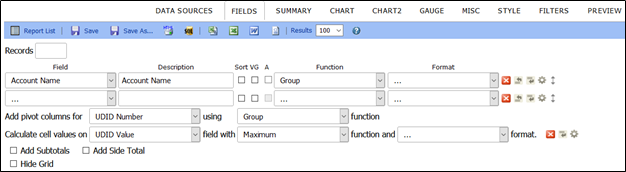
Go to the Fields tab and select Add Pivot.
- In the ‘Add pivot columns for’: Select UDID Number using Group
- In the ‘Calculate cell values on’: Select UDID Value field with Maximum
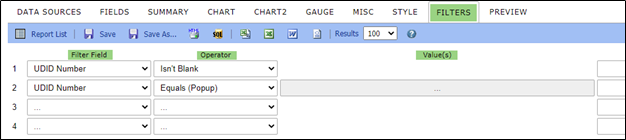
Click the Filters Tab and select UDID Number as the Filter Field.
Select the Operator. Choosing ‘Isn’t Blank’ in the drop down will show all UDID numbers that are used OR select the popup option to check the number needed.
To verify the UDID data displays in the report, click the Preview tab, then add a date range and Corporation and click Continue. Review the preview of the report that displays to verify the data.
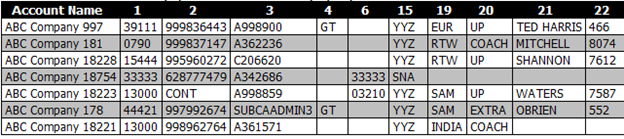
When using the Pivot table to show UDIDs, on the right side, you will see which UDID #’s have data and are being used.
Example:
Save the report. Or, if you want to keep the current report as is, do a Save As and add a new report name to the window that displays which will create a new report.