Advanced Filters allow for more filtering options when running reports and setting up a scheduled batch in GraspDATA.
Advanced Filters allow for more filtering options when running reports. They are also available on the Filters tab when setting up a batch in Report Schedules. You can use Standard Filters OR Advanced Filters, not both.
Contents
Difference Between Standard and Advanced Filters
Advanced Filter Control
This section describes using the Advanced Filters on the Filters tab when running a report. The Advanced Filters are also available on the Filters tab when setting up a batch in Report Schedules. You can use Standard Filters OR Advanced Filters, not both.
To access the Advanced Filters, select the ‘Use Advanced Filters’ radio button on the ‘Filters’ tab:

Note: The word ‘Beta’ appears next to the ‘Use Advanced Filters’ radio button to advise users that the feature is new and may have some unknown issues.
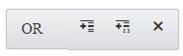
The Advanced Filter control consists of 4 buttons:
- Group Expression keyword: And, Or
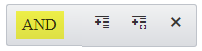
- Add Expression button:

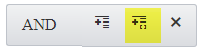
- Add Group button:
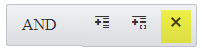
- Remove Item button:
In addition, once you start building an Advanced Filter, the control will display an example of the filter expression below the control.
Example Advanced Filter
The simplest way to describe the Advanced Filter function is by an example. We are going to create an Advanced Filter that says:
Give me all records where:
Account Name is ‘Company 1’ AND the BaseFare > 500
OR
Account Name is ‘Company 2’ AND the BaseFare >= 350.00
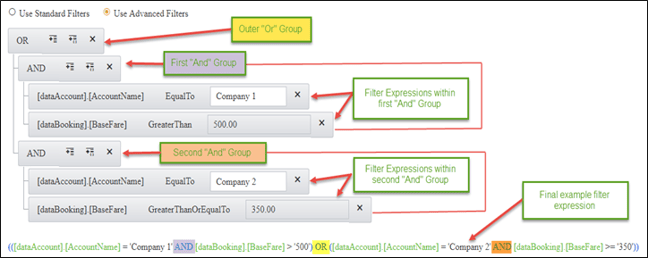
In this example, there is an outer group that uses the ‘OR’ keyword. The ‘OR’ group consists of two inner ‘AND’ groups. Within each of the two ‘AND’ groups there are two filter expressions which are combined with their ‘AND’ group keywords.
So, this example can be read as:
Give me all records where:
AccountName = ‘Company 1’ and BaseFare > 500.00
OR
AccountName = ‘Company 2’ and BaseFare >= 350.00
Building the Previous Example Filter
To build the example filter from the previous example, start with a new Advanced Filter.
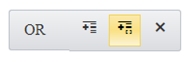
Our example consists of two expressions that are separated by an ‘OR’. So, start by selecting ‘OR’ from the Group Expression keyword dropdown:
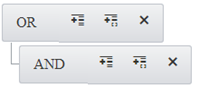
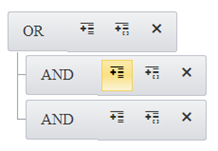
Within our ‘OR’ group, we will have two additional ‘AND’ groups. Click on the ‘Add Group’ button:

This will create one inner group within the OR group:
Because we are going to have two ‘AND’ groups within our ‘OR’ group, go ahead and click the ‘Add Group’ button on the ‘OR’ group, a second time:
Which will give us:
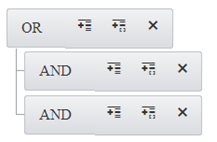
Now we have the basic structure of our filter expression. One ‘OR’ statement, that will contain two ‘AND’ expressions within it. Now we can start filling in the details.
In the first ‘AND’ group, click on its ‘Add Expression’ button:
Which will create:
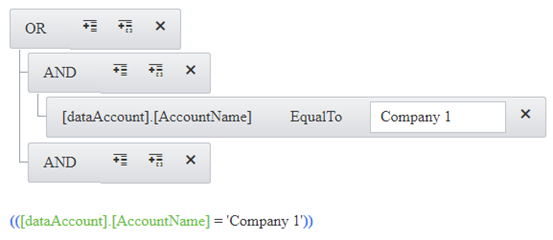
Hover your mouse on the filter column then use the drop-down arrow to choose the option needed. For this example, choose: ‘[dataAccount].[AccountName]’. Also, we want the operator to be ‘equals’, which is the default operator, ‘EqualTo’, so we can leave that as is. Type ‘Company 1’ in the textbox to set the value of the field that we want to filter on.
Now within the first ‘AND’ group, click on its ‘Add Expression’ button again:
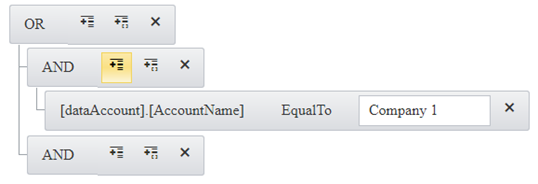
Which will give us:
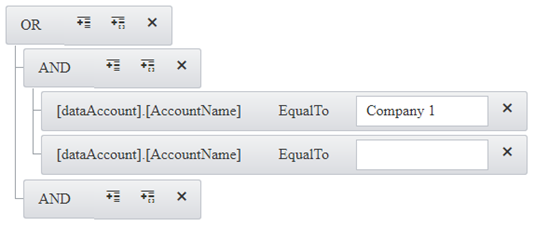
For the second half of this ‘AND’ expression we want to set a filter of BaseFare > 500.00
In the new (second) AND expression, click on the filter column to see a list of columns to select from:
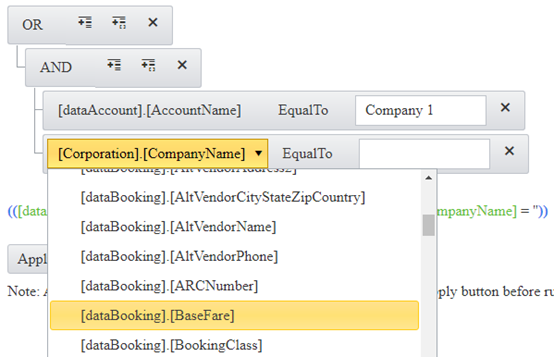
Scroll down and select ‘[dataBooking].[BaseFare]’
Click on the ‘EqualTo’ operator, and select ‘GreaterThan’ from the list:
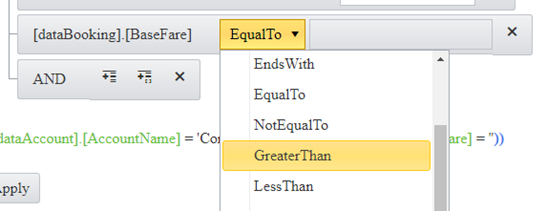
Type ‘500.00’ in the value textbox:

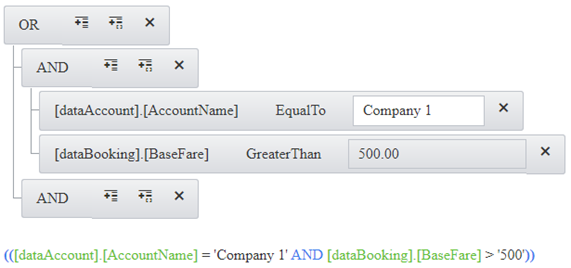
Which gives us our completed first ‘AND’ filter expression:
You can now do the same process for the second AND expression to create the final filter expression:
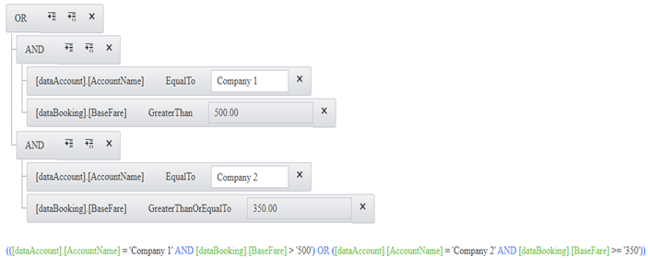
Once all filters are set up, click the ‘Apply’ button:

Selecting Filter Columns
When you click on the Field dropdown you will get a list of all database columns that are available based upon the current report that you are running.
In our example, we used ‘Air Activity Simple’ report (ID #4). This report uses the following tables:
- DataAccount
- DataBooking
- DataBookingType
- DataclientDefined
- DataVendor
So, within the field dropdown you will see a list of database fields (columns) from each of those tables. The field names are preceded by the name of the table they belong to (in case two different tables have the same field name).
Note: The table and field names are surrounded by brackets, and separated by a comma, for easier reading.
When a field is selected, the textbox where you enter the VALUE of this field to filter by will change based on the ‘type’ of the field (integer, money, date time, Boolean, string).
If you select a numeric, or monetary field, the associated textbox will only allow numeric values:
![]()
If you select a field that allows for any open text string, then the associated textbox will allow any character to be entered:
![]()
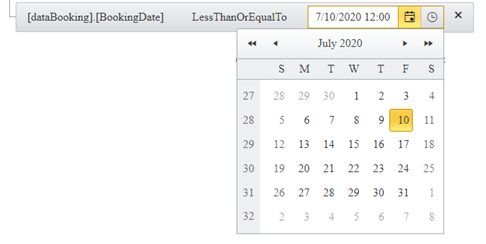
If you select a date or time field, then a Date/Time calendar pop-up will display.
If you select a yes/no type of field, a checkbox will display:
![]()
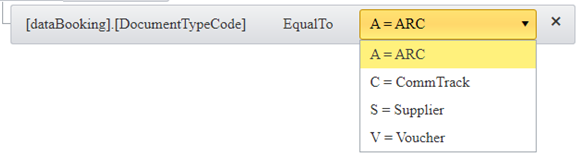
And finally, there are special case fields, that we define, that will display a drop-down list of possible values for the field:
Difference Between Standard and Advanced Filters
Advanced Filters are used in place of the Standard Filters. You cannot use both Standard Filters and Advanced Filters at the same time.
Note: You can set up Standard Filters for a report and then set up Advanced filters for the same report. By clicking on the ‘Use Standard Filters’ and ‘Use Advanced Filters’ radio buttons, you can toggle between the two types of filters. However, the filters used in the running of the report will be whichever filter type was selected, via the radio button, when you finally run the report.
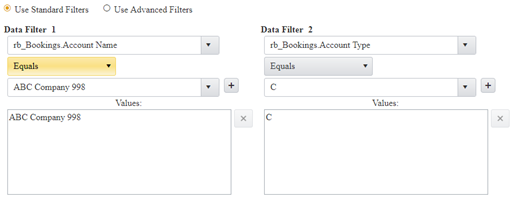
The Standard Filters option allows a user to create between zero and five filters per report. Each of those Standard Filters are concatenated using an ‘AND’ statement. So, you could create a filter such as:
where Account Name = ‘ABC Company 998’ and Account Type = ‘C’
Which would look like this:
However, with Standard Filters you are limited to 5 filters and, more importantly, you cannot create a filter that has an ‘OR’ condition (such as our first example).
Advanced Filters allow you to create more complex and nested filtered expressions using a combination of AND and OR expressions. In addition, there is no arbitrary limit of the number of filters you can add.
Views vs Raw Database Fields
Standard Filters are limited to the fields available to the database views that the report uses. Because our database view fields are often renamed (aliased), the names of the Standard Filter fields are usually well formatted (i.e., they have spacing between words and capitalization).
Advanced Filters first scan the report, and then retrieve a list of ALL database fields from all the tables referenced in the report. The user can then select from a much larger list of possible fields to filter on. Because the raw names of the database fields are displayed, the names are not as nicely formatted as the Standard Filter field names are.
Rerunning a Report
Rerunning a previously executed report from the Report History page, will retain the previous Advanced Filter selections.